
I have seen clear glass lamps all over the place and LOVE LOVE LOVE them, but I don't love the hefty price tag that comes along with them. Why in the world are lamps so expensive anyways?!?!??! I don't get it.
Let me back up a minute... During my middle of the night feedings I usually google ideas that pop in my head, and end up browsing through blogs of course (on my phone- one handed). It keeps me awake so I don't fall asleep and drop Liam. Well I have no idea how I came across it (blame the drowsiness for my lack of memory) but I found this blog called Triangle Honeymoon and their post about a DIY clear glass lamp inspired by Crate & Barrel's Zak lamp that costs $229!
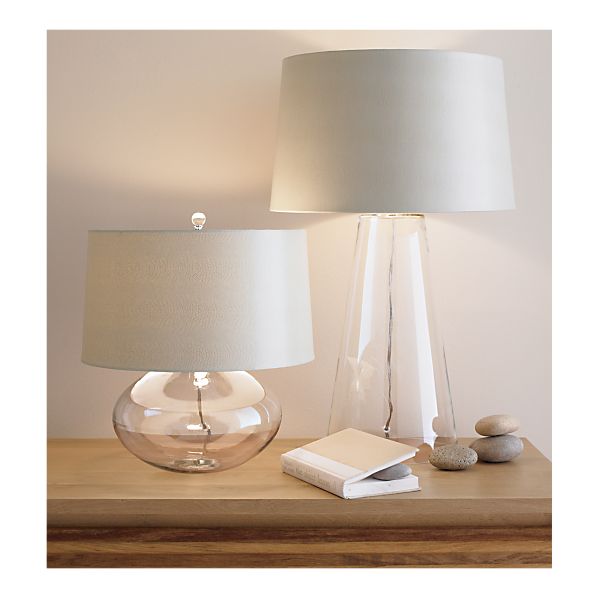
Crate & Barrel
They made one themselves....so why couldn't I?
Here are the supplies I used:
- Large clear glass vase- Home Goods $12.99
- Lamp kit from Lowes $10
- White drum shade from Target $14.99
- Drill bit for glass and tile from Lowes about $8
- Gorilla glue -already had.

I turned the vase upside down and started drilling a hole in the middle of the bottom of the vase (soon to be the TOP of my lamp base). Ryan saw me doing this and decided it looked fun and wanted to take over... be my guest! So actually RYAN drilled the hole with lots of input (aka nagging) from me. Keep the area wet- thats what google said... dont go to fast it will crack... slow down.... don't put too much pressure on it. I'm sure I was a little bit annoying. =) It came out perfect and it was a good inch thick of glass on top.
Once the top hole was drilled, he drilled one on the side, closer to the opening of the vase. This is where the cord would come.


karli you are so creative and smart! and im so happy youre blogging again!! one day when im a real grown up with a house i plan to stay in i plan on doing all these things you do :o) xoxo
ReplyDeleteAm Angela, thanks to Dr Osaze who cured me of HIV. I contacted HIV on my
Deletestruggle to get a good education for my self. The symptoms were already
showing in me, due to my incessant failing health. Until a friend saw
Dr osaze's recommendation online, on how he has helped so many people,
and we decided to reach him. And he applied his herbal medicine on me,
and I bounce back to my previous heath status. In case you want to reach
him for a similar issue you can call him at +2347089275769 or email
him at drosaze39@gmail.com.
WHAT A GREAT MIRACLE THAT I HAVE EVER SEE IN MY LIFE. My names are Clara David I’m a citizen of USA, My younger sister was sicking of breast cancer and her name is Sandra David I and my family have taking her to all kind of hospital in USA still yet no good result. I decided to search for cancer cure so that was how I found a lady called Peter Lizzy. She was testifying to the world about the goodness of a herbal man who has the roots and herbs to cure all kinds of disease and the herbal man's email was there. So I decided to contact the herbal man @herbalist_sakura for my younger sister's help to cure her breast cancer. I contacted him and told him my problem he told me that I should not worry that my sister cancer will be cure, he told me that there is a medicine that he is going to give me that I will cook it and give it to my sister to drink for one week, so I ask how can I receive the cure that I am in USA, he told me That I will pay for the delivery service. The courier service can transport it to me so he told me the amount I will pay, so my dad paid for the delivery fee. two days later I receive the cure from the courier service so I used it as the herbal man instructed me to, before the week complete my sister cancer was healed and it was like a dream to me not knowing that it was physical I and my family were very happy about the miracle of Doctor so my dad wanted to pay him 5 million us dollars the herbal man did not accept the offer from my dad, but I don't know why he didn't accept the offer, he only say that I should tell the world about him and his miracle he perform so am now here to tell the world about him if you or your relative is having any kind of disease that you can't get from the hospital please contact dr.sakuraspellalter@gmail.com or whats app him +2348110114739 you can follow him up on Instagram @herbalist_sakura for the cure, he will help you out with the problem. And if you need more information about the doctor you can mail me davidclara223@gmail.com
Deletei really love this! filing this away in the to do list!
ReplyDeleteI love it! Thanks for sharing this with us. :)
ReplyDeleteI love this. I just returned a glass lamp to JCP because I couldn't clean the inside of it. It was covered in dust. Yours is perfect. Easy to clean.
ReplyDeleteI'm glad you are back!!! I love this project and may have to pull it off this weekend. I've been searching everywhere for a lamp to go on our dresser. I love the gallery wall, can't wait to see more of it. I've had all the frames hung in our room for months and just now ordered the pics today. lol.
ReplyDeleteIt looks wonderful against your gallery wall! I want to try this now:)
ReplyDeleteLove it! I think I have a few glass vases lying around that *need* to turn into lamps! : )
ReplyDeleteI love this Karli! I wonder if I could find a vase thingy like that, but acrylic, in an attempt to be unbreakable from my little menace!
ReplyDeleteThis is so creative! I love what you did...I may have to do it myself...Good work!
ReplyDeleteFabulous!! I want to make one too...thanks.
ReplyDeleteWhat size is the drill bit you used?
ReplyDeleteWONDERFUL! I would love to know the drill bit size as well! : )
ReplyDeleteWhat a fabulous DIY! This is such a unique take on table lamps :) thanks for sharing!
ReplyDeleteTasia
http://rufflesandsequins.blogspot.com
Great blog and pics:)
ReplyDeleteKisses from New York:)
www.TheBrunetteWorld.com
xxx
This is amazing. =) A creative soul you are.
ReplyDeleteFollowed the blog btw, hope you do not mind. And maybe you'll visit me someday.
thebookness.blogspot.com
What a great idea- very clever.
ReplyDeletex
Michelle
www.michellesstylefile.blogspot.com
I love your DIY glass lamp! I want to see more about your wall gallery, though! :) I would like to do something similar and thought that I would do the frames first and add the artwork/photos gradually, too. Love your blog; hope you blog again soon.
ReplyDeleteI do agree with all of the ideas you've presented for your post. They're really convincing and can certainly work. Still, the posts are very short for novices. May just you please prolong them a bit from next time? Thank you for the post.
ReplyDeleteGordini Girl's Fall Line Gloves
What a great DIY!! Beautiful!
ReplyDeletethis looks so great! & so do-able. may have to give it a try! xoxo linds of www.rubygirlblog.com
ReplyDeleteYou have a beautiful blog with so many inspiring posts! Congrats on your work!
ReplyDeleteWould you like to keep in touch following each other?
Home lighting trends also have to do with floor lamps, table lamps, and all varieties of lighting that are not installed in a wall or ceiling. The shapes, sizes, colors, and patterns used in lamps have a great deal to do with home lighting trends. The same is true for the kinds of materials that are used to make the bases and shades of lamps.
ReplyDeleteMiss your posings! Mel
ReplyDeleteIf it's a lamp to be used during daylight hours as well as during later evening hours you may want to consider a three-way bulb lamp that allows you to change the illumination level.
ReplyDeleteCleaning Twickenham No matter what you are trying to get blood out from, the club soda does perfect job. You simply have to drizzle some over the blood-affected spot and let it stay for like minute or so. After that, with a clean sponge blot up everything that gets on the surface. Instead of club soda you could try also dish detergent mixed with water. If the blood stain is on some of your clothes, you will simply have to fill the sink with cold water and add couple of spoons salt.
ReplyDeletechange the order of drilling, the side first, then the top, the side is a lot more likely to crack than the top and it goes through a lot quicker, a lot of time and frustration would be had if you cracked the bottom after spending so much time on the top! :)
ReplyDeleteWow! You were able to make your own table lamp that easy?! I’ll buy the supplies needed first thing tomorrow morning and I’ll start on my own lampshade too! Thanks!
ReplyDeleteI love your version! I never really liked the open bottom ones because they just looked awkward--yours is simply lovely! I think the shape of the vase you chose is wonderful :) I picked up a gorgeous glass pillar candle holder that I'm dying to make into a lamp; just need to hop over to grab a lamp kit. SO excited!!!
ReplyDeleteThese are beautiful, just like you would find in the stores! Take a look at these DIY lamps...they're are different but the process is similar.
ReplyDeletehttp://www.hue13.com/original-diy-lights/
Love it! Thanks for the tutorial. What are the dimensions of the vase?
ReplyDeleteSo cute!! Do you know approximately what the dimensions are for the vase?
ReplyDeleteIts full of information I am looking for and I love to post a comment that "The content of your post is awesome" Great work.
ReplyDeletekoglenlampe.dk
We provide the best and highly quality for table lamps, desk lamps, floor lamps at EliteFixtures. All covered by a full warranty.
ReplyDeletetable lamp-Find a beautiful Table Lamp to add to your living room or desk at onyxexports. Table lamps will have an effect on the whole tone of a room, from bright and gay to dimly-lit and mysterious.
ReplyDeleteGood quality of lights.
ReplyDeleteluxury hanging lights
crystal chandeliers
designer table lamps
designer table lamps india
crystal chandeliers india
I read your blog posts in the last hour. I really enjoy what you are doing here.Thank you for helping people get the information Table Lamp For Sale
ReplyDeleteNice piece of work, drilling glass is not easy.
ReplyDeleteشركة المثالى بروكر افضل شركة مكافحة
ReplyDeleteشركة رش مبيدات بالاحساء
شركة رش مبيدات بالدمام
شركة رش مبيدات بالقطيف
شركة مكافحة حشرات بالخبر
شركة مكافحة حشرات بالجبيل
شركة مكافحة حشرات بالاحساء
شركة مكافحة حشرات بالقطيف
HP Printer Support Number
ReplyDeleteEpson Printer Support Number
Malwarebytes Support Phone Number
Brother Printer Customer Service Canada
HP Printer Support Number
ReplyDeleteEpson Printer Support Number
Malwarebytes Support Phone Number
Brother Printer Customer Service Canada
Irrespective of receiving daily oral or future injectable depot therapies, these require health care visits for medication and monitoring of safety and response. If patients are treated early enough, before a lot of immune system damage has occurred, life expectancy is close to normal, as long as they remain on successful treatment. However, when patients stop therapy, virus rebounds to high levels in most patients, sometimes associated with severe illness because i have gone through this and even an increased risk of death. The aim of “cure”is ongoing but i still do believe my government made millions of ARV drugs instead of finding a cure. for ongoing therapy and monitoring. ARV alone cannot cure HIV as among the cells that are infected are very long-living CD4 memory cells and possibly other cells that act as long-term reservoirs. HIV can hide in these cells without being detected by the body’s immune system. Therefore even when ART completely blocks subsequent rounds of infection of cells, reservoirs that have been infected before therapy initiation persist and from these reservoirs HIV rebounds if therapy is stopped. “Cure” could either mean an eradication cure, which means to completely rid the body of reservoir virus or a functional HIV cure, where HIV may remain in reservoir cells but rebound to high levels is prevented after therapy interruption.Dr Itua Herbal Medicine makes me believes there is a hope for people suffering from,Parkinson's disease,Schizophrenia,Lung Cancer,Breast Cancer,Colo-Rectal Cancer,Blood Cancer,Prostate Cancer,Scoliosis,Fibromyalgia,Fluoroquinolone Toxicity
ReplyDeleteSyndrome Fibrodysplasia Ossificans Progressiva.Fatal Familial Insomnia Factor V Leiden Mutation ,Epilepsy Dupuytren's disease,Desmoplastic small-round-cell tumor Diabetes ,Coeliac disease,Creutzfeldt–Jakob disease,Cerebral Amyloid Angiopathy, Ataxia,Arthritis,Amyotrophic Lateral Sclerosis,Alzheimer's disease,Adrenocortical carcinoma.Asthma,Allergic diseases.Hiv_ Aids,Herpe ,Copd,Hpv,All Cancer Types,Diabetes,Hepatitis,I read about him online how he cure Tasha and Tara so i contacted him on drituaherbalcenter@gmail.com / info@drituaherbalcenter.com. even talked on whatsapps +2348149277967 believe me it was easy i drank his herbal medicine for two weeks and i was cured just like that isn't Dr Itua a wonder man? Yes he is! I thank him so much so i will advise if you are suffering from one of those diseases Pls do contact him he's a nice man.
Thank you for sharing the information about DIY on Table Lamps. I really enjoyed it. You can also Shop europian design Table Lamp online in India at wholesale prices from leading online store
ReplyDeleteStello Light Studio
FINALLY FREE FROM HERPES VIRUSI thought my life had nothing to offer anymore because lifebecame meaningless to me because I had Herpes virus, thesymptoms became very severe and bold and made my familyrun from and abandoned me so they won't get infected. I gaveup everything, my hope, dreams,vision and job because thedoctor told me there's no cure. I consumed so many drugs butthey never cured me but hid the symptoms inside me makingit worse. I was doing some research online someday when Icame across testimonies of some people of how DR Ebhotacured them from Herpes, I never believed at first and thoughtit was a joke but later decided to contact him on the detailsprovided and when I messaged him we talked and he sent mehis herbal medicine and told me to go for a test after twoweeks. Within 7 days of medication the symptomsdisappeared and when I went for a test Lo and behold I wasNEGATIVE by the Doctor Who tested me earlier. Thank you DREbhota because I forever owe you my life and I'll keep ontelling the world about you. If you are going through samesituation worry no more and contact DR Ebhota viadrebhotasolution@gmail. com or WhatsApp him via +2348089535482.he also special on cureing 1. HIV/AIDS2. HERPES 3. CANCER 4.ALS 5. HEPATITIS B 6.DIABETES 7. HUMAN PAPILOMA VIRUS DISEASE(HPV)8. ALZHEIMER 9. LUPUS (Lupus Vulgaris or LupusErythematosus
ReplyDeleteAM SO HAPPY THAT FINELY AM FREE FROM HERPES SIMPLEX VIRUS WITH THE HELP OF DR ASIKA ABUMERE REMEDIES, YOU CAN MAKE AN ORDER TODAY FOR YOUR HEALTH TO BE FREE,
ReplyDeleteIf you think you have Herpes, or HIV, or any kind of disease or infections contact Dr ASIKA ABUMERE REMEDIES need to act fast. If you need treatment immediately, you can reduce the duration of your outbreak. The key is to start medication within 12 to 24 hours of noticing symptoms.•• ☘️Herpes has No medical cure but there is a Natural Remedy which cures it completely.within the period of two weeks This treatment is completely made from natural roots and herbs and dose not have any side effects, l'm sure you have been told that it has no cure but don't you think this is something you have to give a try remember a problem shared is a problem solved Kindly send a DM Dr ASIKA ABUMERE REMEDIES for more info about treatment or Contact him via WhatsApp +2348132311083 or Email him via ( drasikaabumereherbalhome@gmail.com ) privately.
Do you believe that Herpes has a permanent cure? My name is Vera White, I'm in Salt Lake City, Utah. I have been spending lots of money weekly on buying the popular Valtrex and sometimes Acyclovir, to suppress my Herpes outbreaks as prescribed to me in the hospital. Anyone who has herpes can attest this, with all the pains and embarrassing symptoms. Unfortunately, I have found out that those hospital recommended products are frequently not effective at taking care of the problem but rather make you spend all your money. DR.Vadi herbal remedy will get to the root of the cause and cure you completely rather than suppress outbreaks with medication. And you will be happier, healthier, and outbreak free. He also has herbal remedies that can cure HIV, HPV, hepatitis and so on. He is the greatest of all herbal healers. His email is doctorvadi@yahoo.com and his Whatsapp number: +2348074133083. You can contact him and get a permanent cure to your genital and oral Herpes or HIV AIDS or Lungs cancer or Alzheimer's disease.
ReplyDeleteMy health was horrible before I decided to try the Protocol Of taking Dr Ebhota herbal mixture. I felt there was no hope for my health and I was doubtful to try the Protocol thinking it wouldn’t work because I have visited so many hospital but same result. However, I was convinced by my friend to try the herbal medicine because I wanted to get rid of HPV/WART. The herbal mixture that was given to me was really quick and easy to take, and since I have be taking it for less than 3 days I have less outbreak. But within one week i was fully cured from WART/HPV. The herbal medicine really work and I will like to share this great herb doctor contact with you all email him drebhotasolution@gmail.com or whatsapp +2348089535482. Pls try and help yourself out of warts completely today. he also c My health was horrible before I decided to try the Protocol Of taking Dr Ebhota herbal mixture. I felt there was no hope for my health and I was doubtful to try the Protocol thinking it wouldn’t work because I have visited so many hospital but same result. However, I was convinced by my friend to try the herbal medicine because I wanted to get rid of HPV/WART. The herbal mixture that was given to me was really quick and easy to take, and since I have be taking it for less than 3 days I have less outbreak. But within one week i was fully cured from WART/HPV. The herbal medicine really work and I will like to share this great herb doctor contact with you all email him drebhotasolution@gmail.com o r whatsapp +2348089535482. Pls try and help yourself out of warts completely today. he ure DIABETIES ULCAL CANCER etc.He also told me that he has solution for the flowing.1 Cancer cure2 Diabetes cure3 Ringing ear4 Herpes cure5 Warts cure6 HPV cure7 Get your ex back8 Pregnancy herbal medicine9 Prostate enlargement10 Hepatitis B11 Disability12 Kidney problem Etc.
ReplyDeleteWHAT A GREAT MIRACLE THAT I HAVE EVER SEE IN MY LIFE. My names are Clara David I’m a citizen of USA, My younger sister was sicking of breast cancer and her name is Sandra David I and my family have taking her to all kind of hospital in USA still yet no good result. I decided to search for cancer cure so that was how I found a lady called Peter Lizzy. She was testifying to the world about the goodness of a herbal man who has the roots and herbs to cure all kinds of disease and the herbal man's email was there. So I decided to contact the herbal man @herbalist_sakura for my younger sister's help to cure her breast cancer. I contacted him and told him my problem he told me that I should not worry that my sister cancer will be cure, he told me that there is a medicine that he is going to give me that I will cook it and give it to my sister to drink for one week, so I ask how can I receive the cure that I am in USA, he told me That I will pay for the delivery service. The courier service can transport it to me so he told me the amount I will pay, so my dad paid for the delivery fee. two days later I receive the cure from the courier service so I used it as the herbal man instructed me to, before the week complete my sister cancer was healed and it was like a dream to me not knowing that it was physical I and my family were very happy about the miracle of Doctor so my dad wanted to pay him 5 million us dollars the herbal man did not accept the offer from my dad, but I don't know why he didn't accept the offer, he only say that I should tell the world about him and his miracle he perform so am now here to tell the world about him if you or your relative is having any kind of disease that you can't get from the hospital please contact dr.sakuraspellalter@gmail.com or whats app him +2348110114739 you can follow him up on Instagram @herbalist_sakura for the cure, he will help you out with the problem. And if you need more information about the doctor you can mail me davidclara223@gmail.com
ReplyDeleteGood news this is to everyone out there with different health challenges, as I know there are still a lot of people suffering from different health issues and are therefore looking for solutions. I bring you Good news. There is a man called Dr Oseremen a herbal practitioner who helped me to cure Hiv virus, i had suffered from this diseases for the past 5 years and i have spent so much money trying to survive from it. I got my healing by taking the herbal medicine Dr Oseremen sent to me to drink for about 14 days . 3 days after completion of the dosage, I went for a medical checkup and I was tested Hiv negative. all thanks to God for leading me to Dr Oseremen who was able to cure me completely from this deadly diseases, I’m sharing this so that other people can know of this great healer called Dr Oseremen because I got to know he through Jackson who he cured from Genital Herpes Virus. I was made to understand that he can cure several other deadly diseases and infections. Don’t die in ignorance or salient and don’t let that illness take your life. Contact Dr Oseremen through email address Dr.oseremenvadi@gmail.com
ReplyDeleteGod bless Dr Ebacol for his marvelous work in my life, I was diagnosed of HERPES since 2018 and I was taking my medications, I wasn't satisfied i needed to get the HERPES out of my system,I searched out some possible cure for HERPES i saw a comment about Dr Ebacol, how he cured HERPES,DIABETES,HIV,and CANCER with his herbal medicine, I contacted him and he guided me. I asked for solutions, he started the remedy for my health, he sent me the medicine I took the medicine as prescribed by him and 14 days later i was cured from HERPES, Dr Ebacol truly you are great, do you need his help also? Why don’t you contact him through his EMAIL: drebacolherbalhome1@gmail.com call or whatsApp him on +2348159042641
ReplyDeletebuy crystal table lamps online
ReplyDeletevisit our website we also provide complimentry lighting solutions to architects even heavy discount for big orders
ReplyDeleteI have been a herpes carrier for 6 years and I tried every possible means of curing but all of no useful until I saw a health promotion on a herbalist from Africa who prepares herbal medicines to cure all sorts of diseases including cancer and many others sickness, I first doubted It was not true but decided to try, when I contacted this herbal physician via his e-mail, I purchased herpes herbal medicine and received it within 7 days and used it as prescribed, I tested negative within 3 weeks use, do not loose hope to contact him early If you need help, you can WhatsApp at +2348119247891 all you can contact him on his email drdanremedy@gmail.com convinced he can help you too
ReplyDeleteI am so Happy to be writing this article in here, i am here to explore blogs forum about the wonderful and most safe cure for HERPES SIMPLEX VIRUS.I was positive to the Virus called HERPES and i lost hope completely because i was rejected even by my closet friends. i searched online to know and inquire about cure for HERPES and i saw testimony about DR Ebhota online on how he cured so many persons from Herpes Disease so i decided to contact the great herbalist because i know that nature has the power to heal everything. i contacted him to know how he can help me and he told me never to worry that he will help me with the natural herbs from God! after 2 days of contacting him, he told me that the cure has been ready and he sent it to me via FEDEX or DHL and it got to me after 4 days! i used the medicine as he instructed me (MORNING and EVENING) and i was cured! its really like a dream but i'm so happy! that's the reason i decided to also add more comment of Him so that more people can be saved just like me! and if you need his help,contact his Email: (drebhotasoltion@gmail.com) You can contact him on WhatsApp +2348089535482 He also have the herb to cure difference cure for any sickness (1) HERPES,
ReplyDelete(2) DIABETES,
(3) HIV&AIDS,
(4) URINARY TRACT INFECTION,
(5) HEPATITIS B,
(6) IMPOTENCE,
(7) BARENESS/INFERTILITY
(8) DIARRHEA
(9) ASTHMA..
زينب زيادة
ReplyDeleteترتيب الدوري المصري
برشلونة
الأهلي
ليفربول
Informative DIY !! Thank you
ReplyDeletemodern pendant lighting
modern chandeliers
table lamps
best floor lamps for bedroom
My health was horrible before I decided to try the Protocol Of taking Dr. Omola pure herbal mixture. I felt there was no hope for my health and I was to try the Protocol, thinking it wouldn’t work because I have visited so many hospital but same result. However, I was convinced by a Instagram friend to try the herbal medicine because I wanted to get rid of Herpes virus. The herbal mixture that was given to me was really quick and easy to take, within 2 week I was fully cured from Herpes. The herbal medicine really work and I will like to share this great doctor contact with you all email him dr.omolaherbalhome@gmail.com or WhatsApp +2348118116254 you won't regret it, I promise.
ReplyDeleteWHAT A GREAT MIRACLE THAT I HAVE EVER SEE IN MY LIFE. My names are Clara David I’m a citizen of USA, My younger sister was sicking of breast cancer and her name is Sandra David I and my family have taking her to all kind of hospital in USA still yet no good result. I decided to search for cancer cure so that was how I found a lady called Peter Lizzy. She was testifying to the world about the goodness of a herbal man who has the roots and herbs to cure all kinds of disease and the herbal man's email was there. So I decided to contact the herbal man @herbalist_sakura for my younger sister's help to cure her breast cancer. I contacted him and told him my problem he told me that I should not worry that my sister cancer will be cure, he told me that there is a medicine that he is going to give me that I will cook it and give it to my sister to drink for one week, so I ask how can I receive the cure that I am in USA, he told me That I will pay for the delivery service. The courier service can transport it to me so he told me the amount I will pay, so my dad paid for the delivery fee. two days later I receive the cure from the courier service so I used it as the herbal man instructed me to, before the week complete my sister cancer was healed and it was like a dream to me not knowing that it was physical I and my family were very happy about the miracle of Doctor so my dad wanted to pay him 5 million us dollars the herbal man did not accept the offer from my dad, but I don't know why he didn't accept the offer, he only say that I should tell the world about him and his miracle he perform so am now here to tell the world about him if you or your relative is having any kind of disease that you can't get from the hospital please contact dr.sakuraspellalter@gmail.com or WhatsApp him +2348110114739 visit his website https://www.instagram.com/herbalist_sakurahttps://web.facebook.com/herbalistsakura/ https://drsakurahealthclinic.wixsite.com/website https://sites.google.com/view/herbalistsakura https://drsakuraspellcentre.blogspot.com/ https://drsakuraspellcentre.wordpress.com/ for the cure, he will help you out with the problem. And if you need more information about the doctor you can mail me davidclara223@gmail.com
ReplyDeleteتأكد من عدم وجود الأوساخ أو السوائل على الجزء العلوي من البطارية ، وأن الكابلات والمشابك والبراغي ليست مفكوكة أو متسخة أو تالفة. أي تآكل هو علامة سيئة. لمزيد من الحماية ، أضف طبقة رقيقة من الشحوم عالية الحرارة إلى القوائم ووصلات الكابلات.
ReplyDeleteحاول تجنب استنزاف البطارية. تؤدي بعض الإجراءات مثل ترك الأضواء مضاءة أثناء عدم تشغيل السيارة إلى إتلاف البطارية تدريجيًا.
ستحتوي السيارات إما على ضوء تحذير للبطارية أو ضوء فحص للمحرك يظهر على لوحة القيادة عندما تحتاج البطارية للصيانة.
صيانة مرسيدس
صيانة بورش
صيانة اودي
صيانة رنج روفر
صيانة بي ام دبليو
This comment has been removed by the author.
ReplyDeleteNice Articl,LT E-shop is a familiar brand for providing High Quality LED lights at an affordable price. Our products are really useful for your home in the way of reducing the amount of heat and produces attractive illumination. We offering a variety of Led lights in Bangalore free from all types of defects.
ReplyDeleteHello everyone any doctor tha tell you that there is no cure for herpes tell him/her that is a lie about it becouse i am a living testimony herpes can be cured because it truly has a complete cure. I’m a living witness of it because I recently got rid of my HSV VIRUS within just two weeks. And as I speak right now! I’m perfectly cured from the herpes disease. There is a cure and it's called herbal medicine. I'm so glad to have come in contact with Herbal doctor Kham who is also known as the two weeks healer of herpes virus. Doctor Kham got me cured completely from my long term genital herpes (HSV VIRUS) with the help of his powerful and effective herbal medication which I took for only two weeks, and I got a good result being cured from the herpes disease. If you are out there diagnosed or suffering from the herpes virus you can reach out to Herbal doctor Kham for help in getting rid of your herpes virus forever just the way he helped me got rid of mine; His email address is draboloherbalhome@gmail.com or for his quick response to you, you can reach him on WhatsApp with +2347044725611 The medical industry/Big Pharmacies make huge profits off treatments and modern drugs/medicines that can't even get the herpes virus cured. That's why they don't want you to know the cure. Aaron Traywick had a cure for HIV and herpes and he turned up dead like a week later, even Nipsey Hussell was murdered along with Lisa Left Eye Lopes by the US Government simply because these people were doing a research on how Dr Sebi makes herb for the cure to herpes virus and HIV. The Doctor Sebi in question was also killed by the US Government just because he was having the cure to herpes and HIV. Don't you find that fishy?
ReplyDeleteplease help yourself and contact him he cure different kins disease such as
.HIV,HEPATITIE,CRE,FLU,RABIES,WEST NILE VIRUS,ZIKA,PERTUSSIS,SHIGELLOSIS,ZIKA,ETC ANY DEADLY VIRUSES HE IS THE ONLY S0LUTION
what a great testimony about doctor ONUWA i want to use this opportunity to thank doctor ONUWA on how i was cured from HSV 3 months ago i want to the hospital for a test and i confirmed that i have HSV positive since 4 years ago and i contacted so many doctors and all the doctor was all scam since 4 years ago but a friend of mine introduce me to doctor ONUWA how he was cured from HSV and i really contacted him and i purchase for the items after that doctor ONUWA sent me the medication and tells me the instruction on how i will be taking the medication how i take the medication for 2 weeks and 3 days after taking it i went to the hospital to confirm and the news was so excited confirmed that i was HSV negative once again i want to thank doctor ONUWA for the great thing he done for me you can contact him on is EMAIL dronuwa2@gmail.com and him whats-app number +2348115914591 he can cure a lot of disease
ReplyDelete1 Cancer
2 Hpv1/2
3 HEPATITIS A AND B
4 DIABETIC.
5 HIV
once again thank you doctor ONUWA i will be ever grateful to you
ReplyDeleteما هي تكلفة صيانة السيارة؟
كم تكلفة خدمة السيارة؟ يجب أن تعتمد تكاليف خدمة السيارة النموذجية على طراز وطراز سيارتك ومستوى الخدمة التي تحتاجها ، ويجب أن تكون تكاليف خدمة السيارة النموذجية:
الخدمة المؤقتة من 99
الخدمة الكاملة ابتداءً من 149
توفر العديد من Autos Ltd أسعارًا ممتازة لكلا المستويين من خدمات السيارات في Reading. نتفوق باستمرار على أسعار خدمة الوكلاء بنسبة تصل إلى 30?. كما نقدم خدمة تحصيل وتوصيل مجانية لجميع سيارات عملائنا ، مما يوفر لك الوقت والجهد والمال.
ما نوع خطة خدمة السيارة التي تحتاجها؟
تم تصميم الخدمة المؤقتة كخدمة إضافية للسائقين الذين يسافرون لمسافات طويلة. يوصى به بعد 6 أشهر من القيادة ، وتغطي مسافات تبلغ حوالي 2000 ميل شهريًا.
يجب على كل سائق جدولة خدمة كاملة لسيارته مرة واحدة في السنة.
من المقدر أننا نقود ما يقرب من 12000 ميل في السنة في المتوسط. مع هذا القدر من القيادة ، ستكون سيارتك جاهزة لإعادة تعبئتها واستبدال الأجزاء المستهلكة والسوائل.
صيانة بي ام دبليو
صيانة بيجو
صيانة تويوتا
I'm so Happy to write this article because I know it will help a lot of people who are suffering from Herpes. I am here to testify about the wonderful and most safe cure for herpes . I was positive to the deadly Virus called herpes and I lost hope completely because I was rejected even by my closest friends. I searched online to know and inquire about a cure for herpes and I saw testimony online on how Herbalist called Dr Osamu who cured so many people from Herpes virus and other similar diseases. I decided to contact the great herbalist because I know that nature has the power to heal everything. I contacted him to know how he can help me and he told me never to worry that he will help me with the natural roots and herbs. After 2 days of contacting him, he told me that the cure is ready and he sent it to me via UPS and it got to me after 4 days. I used the medicine as he instructed (morning and evening ) and I got cured. it's really like a dream but I'm so happy that's the reason i decided to also add more comment of Him so that more people can be saved just like me and if you need his help, contact him via Email: dr.osamuherbalremedy@gmail.com or WhatsApp:+2349012406016
ReplyDeleteI am from California USA I was diagnosed of HERPES Virus in 2016 and I have tried all I can to get cured but all to no avail, until i saw a post in a health forum about a herbalist man who prepare herbal medication to cure all kind of diseases including HERPES virus, at first i doubted if it was real but decided to give it a try , when i contact this herbalist via his email and he prepared a HERPES herbal cure and sent it to me via UPS delivery company service, when i received this herbal cure, he gave me step by directions on how to apply it, when i applied it as instructed, i was totally cured of this deadly virus within 14days of usage, I am now free from the deadly virus called herpes, all thanks to doctor UMA, Contact this great herbal doctor via his email dr.umaherbalcenter@gmail.com call or whatsapp him on his mobile number +2347035619585,
ReplyDeleteHe also have the herb to cure:
(1) CANCERS,
(2) DIABETES,
(3) HIV/AIDS,
(4) PENIS ENLARGEMENT,
(5) PREGNANCY,
(6) DIABETES,
(7) EX BACK.
How can I explain this to the world that there is a man who can cure HERPES, I was diagnosed for the past 5 mouth I have being into HERPES since 5 mouth, so I decide to look for help in the internet then I found a post write about this great man called DR. Ehimare , people say good thing about him that this man have cured, a lot of people in the internet, him has power's to cure HSV1 AND HSV2 I don’t believe that there is a cure for Herpes Simplex Virus because though there is no cure for herpes that what I have in mind HERPES had no cure well , my HERPES is negative through the using of herbal cured of DR. Ehimare , I contacted this man for help because of what i see in the internet. if you need his cured just add him now on Hangouts Drehimare3@gmail.com , thank you DR.Ehimare i will never stop shearing you testimony DR. Ehimare him Can as well CURE
ReplyDeleteTHE FOLLOWING DISEASE:-1, HIV/AIDS, 2, Diseases of the hear 3, Malignant tumors 4. Cardiovascular diseases 5. Diabetes mellifluous 6.Influenza and pneumonia 7.Alzheimer's disease 8. hsv1 - hsv2. If you need LOVE SPELL. E.T.C contact him Drehimare3@gmail.com or you whatsapp him on + 1 (267) 691-1087
I am so grateful for your post. Much thanks again. Really Great. 대딸방
ReplyDeleteRight now it seems like Drupal is the best blogging platform available right now. (from what I’ve read) Is that what you’re using on your blog? 횟수 무제한 출장
ReplyDelete“He likes to take a traditional and risk-averse approach to things over a creative one.”
ReplyDelete스포츠마사지
I just found this blog and have high hopes for it to continue. Keep up the great work, its hard to find good ones. I have added to my favorites. Thank You.
ReplyDelete온라인경마
경마사이트
I precisely needed to thank you so much yet again. I do not know the things I would’ve taken care of without these secrets contributed by you regarding this problem. It seemed to be a very frightful crisis for me, but encountering a new well-written tactic you processed it forced me to jump with contentment. 바카라사이트
ReplyDelete[ ] I'm here to testify about the great work Dr Ehimare did for me. I have been suffering from (HERPES) disease for the past 5 years and had constant pain, especially in my knees. During the first year,I had faith in God that i would be healed someday.This disease started circulating all over my body and i have been taking treatment from my doctor, few weeks ago I came across a testimony of one lady on the internet testifying about a Man called Dr Ehimare on how he cured her from HIV Virus. And she also gave the email address of this man and advise anybody to contact Dr Ehimare for help for any kind of sickness that he would be of help, so I emailed him on ( Drehimare3@gmail.com ) telling him about my (HERPES Virus) he told me not to worry that i was going to be cured!! Well i never believed it,, well after all the procedures and remedy given to me by this man few weeks later i started experiencing changes all over me as Dr Ehimare assured me that i will be cured,after some time i went to my doctor to confirmed if i have be finally healed behold it was TRUE, So - [ ] friends my advise is if you have such sickness or any other at all you can contact Dr ehimare via email. { Drehimare3@gmail.com }or call or what sapp him on + 1 (267) 691-1087- [ ] DR Ehimare CAN AS WELL CURE THE FOLLOWING DISEASE:-- [ ] HIV/AIDS- [ ] HERPES- [ ] CANCER- [ ] ALS- [ ] cancer - [ ] Diabetes
ReplyDeleteHELLO everyone! Still don’t know the right words to express my Gratitude to the Great Dr Abolo After been diagnosed with the Herpes for the passed 3years, i was given so many health prescription and advice with no improvement, I totally lost hope, until i found many testimonies of Great Dr Abolo in an online research Like anybody would be, i advice any one that is living with herpes should Contact the only Great Dr Abolo Email:draboloherbalhome@gmail.com or WhatsApp +2347044725611 today, because he has cure my Herpes totally He also have herbs medicine to cure the following diseases; CANCER EPILEPSY. HIV AIDS. DIABETICS HEPATITIS,
ReplyDeleteGood day to you all from the United States,I have been suffering from (HERPES) disease for the last eight years and have had constant pain, especially in my private parts. During the first year,I had faith in God that i would be healed someday.This disease started circulate all over my body and i have been taking treatment from my doctor, few weeks ago i came on search on the internet if i could get any information concerning the prevention of this disease, on my search i saw a testimony of someone who has been healed from (Hepatitis B diabetes) by this Man Dr Ehimare and she also gave the email address of this man and advise me to contact him for any sickness that he would be of help, so i wrote to Dr Ehimare telling him about my (HERPES Virus) he told me not to worry that i was going to be cured!! hmm i never believed it,, well after all the procedures and remedy given to me by this man, few weeks later i started experiencing changes all over me as Dr Ehimare assured me ,after some time i went to my doctor to confirmed if i have be finally healed, behold it was TRUE, email Dr Ehimare on : (drehimare3@gmail.com ) whatsapp him : +1 (267) 691-1087 And He also have herbs medicine to cured the following diseases; eczema,urethra wart,chronic problems.Herpes, Cancer, Als,Hepatitis, Diabetes, HPV,Infections,ulcer ETC
ReplyDeleteInformative blog!
ReplyDeleteThank you,
Relucente
wow what a lovly ideas for us. thanks you so much and merry xmas.
ReplyDeleteResep Masakan untuk anak
ReplyDeleteFilm Terbaru yang di tunggu tunggu
Biodata Pemain
Biografi Pemain
OP : Yamato One Piece
Arti Lambang di eropa
Film Terbaru yang di tunggu tunggu
THE MAN GOD SENT TO HELP ME IS DR EBOSELE.
ReplyDeleteIt is said that when someone has done good for you he or she has to be appreciated this is why am here to appreciate and share a good news about DR EBOSELE for curing me from the Genital Herpes. AM ISABELLA and i have been dealing with HSV1 AND SINCE 2019 until 2021 when i can to contact the God sent man DR EBOSELE who gave 2 weeks treatment and suddenly all the pox on my skin has left and am herpes free with the cure from EBOSELE SOLUTIONS . with this great happiness in my heart i wanna ask ya all to join me thank him and if anyone need help to cure any kind of disease or anything prayers kindly contact him today via his details below:
Email; eboselesolutions@gmail.com,
Whatsapp/call; +2348146646995
cureforherpesnow665.blogspot.com
I am here to give my testimony about Dr Ubarlo who helped me.. i want to inform the public how i was cured from (HERPES SIMPLEX VIRUS) by Dr Ubarlo, i visited different hospital but they gave me list of drugs like Famvir, Zovirax, and Valtrex which is very expensive to treat the symptoms and never cured me. I was browsing through the Internet searching for remedy on HERPES and i saw comment of people talking about how Dr Ubarlo cured them. when i contacted him he gave me hope and send a Herbal medicine to me that i took for just 2 weeks and it seriously worked for me, my HERPES result came out negative. I am so happy as i am sharing this testimony. My advice to you all who thinks that there is no cure for herpes that is Not true just contact him and get cure from Dr Ubarlo healing herbal cure of all kinds of sickness you may have like
ReplyDelete(1) CANCER,
(2) DIABETES,
(3) HIV&AIDS,
(4) URINARY TRACT INFECTION,
(5) CANCER,
(6) IMPOTENCE,
(7) BARENESS/INFERTILITY
(8) DIARRHEA
(9) ASTHMA
(10)SIMPLEX HERPES AND GENITAL
(11)COLD SORE
(12) ENLARGEMENT CREAM
and mare that are not mentioned here
. he also cure my friend from cervical cancer. so contact him thruogh his Email address drubarlohome@gmail.com or whatsapp him on +2348119508814
Buy CDC Vaccination cards online
ReplyDelete+1 (901) 878-9747 Buy covid 19 Vaccination cards online
#BuyCovidVaccineCard #covid #pfizer #vaccine #cdc #covidvaccinecertificate #buycovidcertificate #covid-19 #corona #vaccination #certification #cdcvaccinecertificate #covidcertification #corona #coronavaccinecertificate
Buy covid 19 Vaccination cards online
CALL/TEXT : +1 (901) 878-9747
WHATSAPP: +1 (901) 878-9747
Telegram: @Approveddocumente
EMAIL : approvedocs365@gmail.com
I have be living with Oral herpes for over 4 years now and it has be a big problem for me.I have been looking for solution because i can't leave with it, One day i came across a woman testimony on a forum saying she got cured of her Herpes with the help of Dr OBUDU an herbal doctor from African with herbal medicine. At first i did not believe because i was not sure herbs can really take this virus away,but i have no choice than to give it a try and contacted him with his emails, i explain my problems,.. then he told me not to worry that he will prepare the a cure with herbal mixture and send it to me, i got the medicine after 4 days delivery and i use as instructed. After 21 days when the herb got almost finished, I went to a medical doctor, i did a test and discovered that the virus was gone, and my test results were HSV 1%2 negative,i was so surprised and happy! Then I wrote to Dr OBUDU and thanked him for getting me cured from herpes. I advice you to contact this great herbal doctor OBUDU as he have cure for different kinds of diseases.i decided to share this testimony to let others who also suffer from herpes know about this and give hope to others, you can reach him via Email drobuduherbalhome@gmail.com also https://drobuduherbalhome.wixsite.com/welcometoobuduherbal WhatsAPP number +2349023428871
ReplyDeleteSuffering from herpes is a Terrible Experience which I suffered till I met a herbal doctor called Dr Asia. I tried Herbs from some other Herbal Dr. as well by communicating with them but i never received cure. Just about few month ago i saw a recent post of how Dr Asia herbs, has cured a lot of people and that he is a honest man to work with in the procedures on finding a cure to herpes then i contacted him in trial and the Herbs he Sent me got me Cured after 14 days. Of using his herbal remedies I am so happy that I am free. well, his email is doctorasiafreedhome@gmail.com or add him on whatsapp +2349057350337
ReplyDeleteFon perde modelleri
ReplyDeleteMobil onay
mobil ödeme bozdurma
nftnasilalinir.com
ankara evden eve nakliyat
trafik sigortası
DEDEKTÖR
web sitesi kurma
Aşk kitapları
I want to share a testimony, how i was cured from Herpes by DR AGUGU with his herbal remedy. I don't know where to start, I'm 33 years old and i was diagnoses of genital herpes diseases for 5 years. i lost all hope in life but on like any other i still searched for a cure even on the internet and i saw a comment were a lady testify how she was cured by Dr AGUGU i could not believe it at first, i contacted him, He sent me his herbal remedy i used it for 2 weeks and the Herpes virus was cured completely. I went for medical check and the result was negative from Herpes.
ReplyDeleteFor those who have the same problem, or any STD should contact Dr AGUGU via email: agugusolutionhome@gmail.com you can also call or WhatsApp +2349123794867
Good content. You write beautiful things.
ReplyDeletetaksi
hacklink
sportsbet
mrbahis
mrbahis
vbet
hacklink
sportsbet
korsan taksi
Success Write content success. Thanks.
ReplyDeletekralbet
betpark
deneme bonusu
betturkey
canlı poker siteleri
canlı slot siteleri
betmatik
Online Shopping Gulmohar Lane. This to buy home decor and home designs Table Lamps Online products with best offers in India.
ReplyDeletekralbet
ReplyDeletebetpark
tipobet
slot siteleri
kibris bahis siteleri
poker siteleri
bonus veren siteler
mobil ödeme bahis
betmatik
KVAQ
urfa
ReplyDeleteantakya
ısparta
aydın
diyarbakır
EP4R54
QUICK EASY EMERGENCY URGENT LOANS LOAN OFFER EVERYONE APPLY NOW +918929509036 financialserviceoffer876@gmail.com Dr. James Eric
ReplyDeletesalt likit
ReplyDeletesalt likit
SDLXJ
https://saglamproxy.com
ReplyDeletemetin2 proxy
proxy satın al
knight online proxy
mobil proxy satın al
ULWHX4
https://saglamproxy.com
ReplyDeletemetin2 proxy
proxy satın al
knight online proxy
mobil proxy satın al
662A
https://bayanlarsitesi.com/
ReplyDeleteTokat
Kastamonu
Tekirdağ
Gümüşhane
KBC0KS
Afyon
ReplyDeleteAntalya
Erzurum
Mersin
izmir
EGİ2
Mardin
ReplyDeleteistanbul
Çanakkale
Antep
Elazığ
HZMİP
elazığ
ReplyDeletebilecik
kilis
sakarya
yozgat
ZMNCF
istanbul evden eve nakliyat
ReplyDeletebalıkesir evden eve nakliyat
şırnak evden eve nakliyat
kocaeli evden eve nakliyat
bayburt evden eve nakliyat
3PBE
ordu evden eve nakliyat
ReplyDeletebursa evden eve nakliyat
konya evden eve nakliyat
osmaniye evden eve nakliyat
bitlis evden eve nakliyat
SJNW
41DE4
ReplyDeleteAnkara Parke Ustası
Kastamonu Parça Eşya Taşıma
Kucoin Güvenilir mi
Burdur Evden Eve Nakliyat
Niğde Evden Eve Nakliyat
Bursa Evden Eve Nakliyat
Ağrı Lojistik
Kırıkkale Şehir İçi Nakliyat
Ankara Evden Eve Nakliyat
D1B77
ReplyDeleteOsmaniye Şehir İçi Nakliyat
Isparta Parça Eşya Taşıma
Çerkezköy Oto Boya
Antalya Şehirler Arası Nakliyat
Altındağ Parke Ustası
Burdur Şehirler Arası Nakliyat
Ünye Parke Ustası
Coin Nedir
Uşak Parça Eşya Taşıma
9C103
ReplyDeleteOsmaniye Lojistik
Çankaya Boya Ustası
Samsun Parça Eşya Taşıma
Çorum Lojistik
Çorum Şehir İçi Nakliyat
Ünye Petek Temizleme
Keçiören Parke Ustası
Sinop Lojistik
Giresun Lojistik
F114C
ReplyDeleteAmasya Evden Eve Nakliyat
Bolu Lojistik
Konya Parça Eşya Taşıma
Aksaray Şehirler Arası Nakliyat
Ünye Halı Yıkama
Osmaniye Parça Eşya Taşıma
Düzce Şehirler Arası Nakliyat
Muş Parça Eşya Taşıma
Kayseri Evden Eve Nakliyat
DAAB1
ReplyDelete%20 komisyon indirimi
1CD31
ReplyDeleteOkex Borsası Güvenilir mi
Alya Coin Hangi Borsada
Bitcoin Üretme
Loop Network Coin Hangi Borsada
Threads Takipçi Hilesi
Mexc Borsası Güvenilir mi
Hexa Coin Hangi Borsada
Coin Nasıl Alınır
Görüntülü Sohbet Parasız
F183E
ReplyDeleteSoundcloud Beğeni Satın Al
Twitter Trend Topic Hilesi
Btcst Coin Hangi Borsada
Spotify Dinlenme Satın Al
Parasız Görüntülü Sohbet
Facebook Sayfa Beğeni Satın Al
Sohbet
Referans Kimliği Nedir
Facebook Sayfa Beğeni Hilesi
BACCC
ReplyDeleteKağızman
Gerze
Günyüzü
Ulaş
Kofçaz
Kiğı
Çıldır
Aydın
Kabataş
eskort eryaman,
ReplyDeleteEryaman eskort bayan,
Eryaman eskort,
Eskort Bayan,
HOF5
Ataşehir eskort
ReplyDeleteKadıköy eskort
Bostancı eskort
Ümraniye eskort
İstanbul eskort
Anadolu Yakası eskort
eskort bayan
AAH0
Ataşehir eskort
ReplyDeleteKadıköy eskort
Bostancı eskort
Anadolu Yakası eskort
4JV
dfdsgfgbtyyhyth
ReplyDeleteمكافحة حشرات
hgnjvhujmk
ReplyDeleteشركة صيانة افران بجدة
شركة مكافحة النمل الابيض z5STkc0dvn
ReplyDelete369F1BC2F7
ReplyDeletewhatsapp kameralı show
شركة تسليك مجاري بالدمام PDFVObd5bb
ReplyDeleteشركة مكافحة الحمام بر اس تنورة CQOHYI67i9
ReplyDelete9C23D711BA
ReplyDeletebot takipçi atma
6E36053919
ReplyDeleteRazer Gold Promosyon Kodu
101 okey yalla hediye kodu
Yalla Hediye Kodu
zula hediye kodu
brawl stars elmas kodu
7EAE7F3062
ReplyDeleteturk takipci satin al instagram
0E15159838
ReplyDeletebayan takipçi
Azar Elmas Kodu
Türkiye Posta Kodu
Kafa Topu Elmas Kodu
Erasmus Proje
Sıra Bulucu
Razer Gold Promosyon Kodu
Pasha Fencer Hediye Kodu
Stumble Guys Elmas Kodu
482988EED8
ReplyDeleteAnadoluslot Yeni Adres
Anadoluslot
Anadoluslot
Anadoluslot
Trwin Güncel Adres
Trwin
Trwin
Trwin Yeni Adres
Trwin Güncel Adres
شركة تنظيف سجاد وموكيت بجازان sBN8WsqGly
ReplyDeleteEC997C5A49
ReplyDeleteTelegram Para Kazandıran Botlar
Telegram Para Kazanma Botları
Telegram Para Kazanma Botları
Telegram Para Kazanma
Binance Hesap Acma
شركة عزل فوم بالمجمعة
ReplyDeleteDe168DFrAE
131E970DE1
ReplyDeletetwitter bot takipçi
tiktok beğeni satın al
düşmeyen takipçi
takipçi
ucuz takipçi
شركة تنظيف شقق وعمائر بالبكيرية
ReplyDeleteOMN3XjzaNh
شركة عزل فوم بالمزاحمية
ReplyDeleteABG6G7kES8
جهاز كشف اعطال الكهرباء بالرياض
ReplyDelete3Cq1JQ9ifW
جهاز كشف التماس الكهرباء بالدمام
ReplyDeletepmUinzxV8M
شركة تنظيف افران بجدة
ReplyDeleteBDdi8TwTOkq
Aluminum machines are extensively used in window and door manufacturing, curtain wall systems, automotive components, and furniture production. door production play a crucial role in cutting, drilling, milling, and assembling aluminum profiles with precision and efficiency. Their versatility allows manufacturers to produce customized designs and complex shapes, meeting the growing demand for modern aluminum structures in both residential and commercial projects.
ReplyDelete